This guide will show you how to properly configure the DNS to make sure you are pointing your domain to the right IP address.
There is a lot of registrars from which you can purchase a domain so in this tutorial we will give you basic knowledge and then we will try to show you how to configure the DNS on the most popular domain registrars.
What is the same on all domain providers, is surely that to configure the DNS for your domain name, first you need to go to the DNS settings of your domain registrar. Then you need to fill in the hostname field with the server’s IP address that is authoritative for your domain and put in a TTL value for how long it should take before other servers should be queried.
1. What is DNS and Why does it Matter?
DNS stands for Domain Name System. It is a system that translates domain names into IP addresses. The Internet relies on DNS to work correctly. This is why it is essential to understand how it works and what the consequences are of not having a working DNS server.
2. What is a DNS A record
An A record is a type of DNS record. It is a resource record that maps an IP address to another name. It is used to tell the Domain Name System (DNS) what web server should be contacted to fulfill requests for domain names ending in one of that domain’s subdomains.
A records are the simplest and most common type of mapping between an IP and a domain, but the HTML code you need to include in your web page can become more complicated if you want to use other types of mappings.
3. What is a DNS CNAME record
A CNAME record is a type of DNS record that most commonly points to a website’s web hosting service. The way a CNAME works is by taking the domain name you want, adding it to your domain name provider’s management panel, and then selecting the desired hostname from their list of servers.
4. How to configure the DNS for your shop Vetrina Live
Vetrina Live allows you to connect your custom domain to your online shop following a few, easy steps:
a) Configure the DNS: delete and add A Records
To configure the DNS for your domain, you need to go to the DNS settings of your domain registrar and look for DNS records.
The action to perform is very easy: you just need to delete all records related to a website (it’s not necessary to delete records for the email), generally, Type A and CNAME ones. After that you have to add 2 A Records as the following:
| Type | Name | Value | TTL |
| A | yourdomain.com (or “@”) | 18.156.195.76 | auto |
| A | www.yourdomain.com (or “www”) | 18.156.195.76 | auto |
After you add these two records, you need to wait the necessary time for the DNS to update, usually up to 24 hours.
We recommend you always follow your provider’s method since in many cases, the Name is replaced by a @.
b) Add your domain in Vetrina Live Admin Panel
Once you finished the procedure in point a), you can log in to your Vetrina Live account and go to Settings.
Here you can add your custom domain in the related field:

After you did it, the procedure is completed and you just need to wait for your domain to be correctly linked to your vetrinalive shop.
5. How to configure the DNS on the most used Registrars
As we mentioned before, each registrar uses its own method to set up the DNS (we are referring to point a) in the 4th paragraph) and even if the procedure is quite similar to all of them, in this guide we will show you how to do it with the most used providers on the market. This guide will be updated every time users ask us how to configure their DNS on new service providers.
GoDaddy
To add an A Record on GoDaddy the first thing to do is login and go to the Domain Control Center and then:
- Select the domain you want to edit
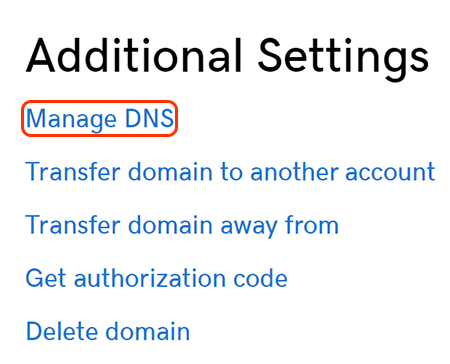
- Under Additional Settings, select Manage DNS
- Click on Add under the records table
- Choose Type A
- Enter the details for your A record as following
| Type | Name | Value | TTL |
| A | @ | 18.156.195.76 | 1 hour |
| A | www | 18.156.195.76 | 1 hour |
Remember that if there are already A Type Records, you must delete them or edit adding the correct information to point your domain to your Vetrina Live e-commerce. Here’s the link to the official guide on GoDaddy.
Cloudflare
If you need to add DNS records on Cloudflare, once logged in, you must go to DNS and then select Add record with the following data:
| Type | Name | Value | TTL | Proxy Status |
| A | yourdomain.com | 18.156.195.76 | Auto | DNS Only |
| A | www.yourdomain.com | 18.156.195.76 | Auto | DNS Only |

Always remember to remove the existing A records. Here’s the Official Cloudflare Guide.
Namecheap
To configure your DNS on Namecheap, you must sign in to your Namecheap account and then:
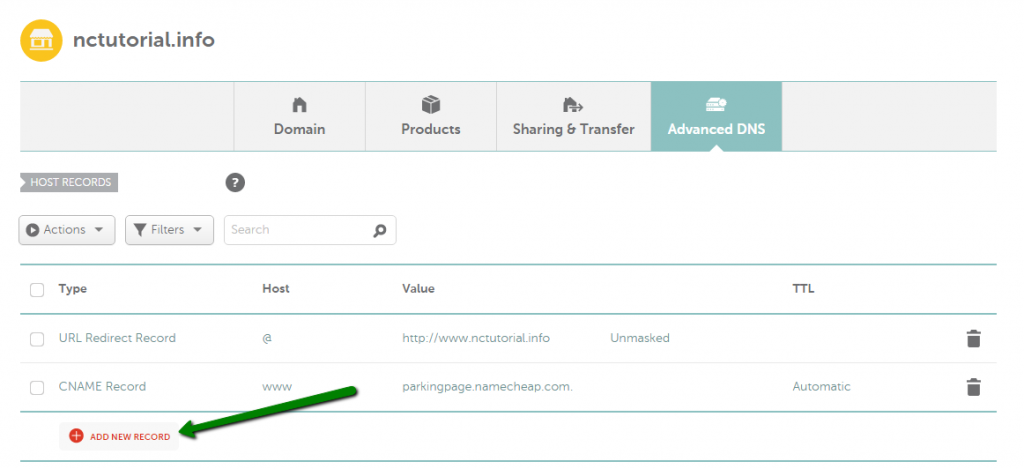
- Select Domain List from the left sidebar and click on the Manage button on your domain
- Click on the Advanced DNS tab at the top of the page
- Click on Add New Record below the dns table

Use the following information to set up correctly your A records to point your domain to your vetrinalive online shop.
| Type | Name | Value | TTL |
| A | @ | 18.156.195.76 | Automatic |
| A | www | 18.156.195.76 | Automatic |
Remember always to remove already existing A records to not create a conflict. Here’s the complete official guide from Namecheap.
OVH
To set up the DNS on OVH, first login into the OVHcloud Control Panel and then click on Domains in the services bar on the left. Then choose the domain you want to edit and then go to the DNS zone tab.
To add a new record, you just need to click on Add an entry:

And then use the following details:
| Type | Domain | Target | TTL |
| A | yourdomain.com | 18.156.195.76 | as default |
| A | www.yourdomain.com | 18.156.195.76 | as default |
If you already have A records, you must delete them before adding new ones or you can edit them by changing values. Here’s the full guide from OVH.
Register
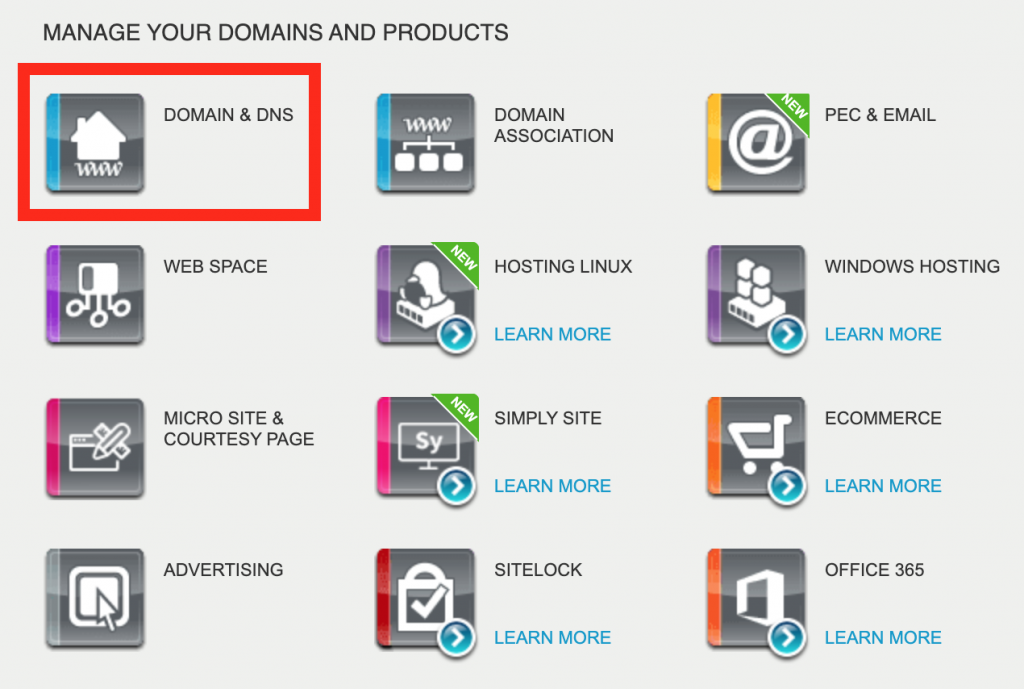
To change the DNS settings on Register, you must access the Control Panel and click on the domain you want to edit under the right column Your Products. After that, you can click on Domain & DNS.


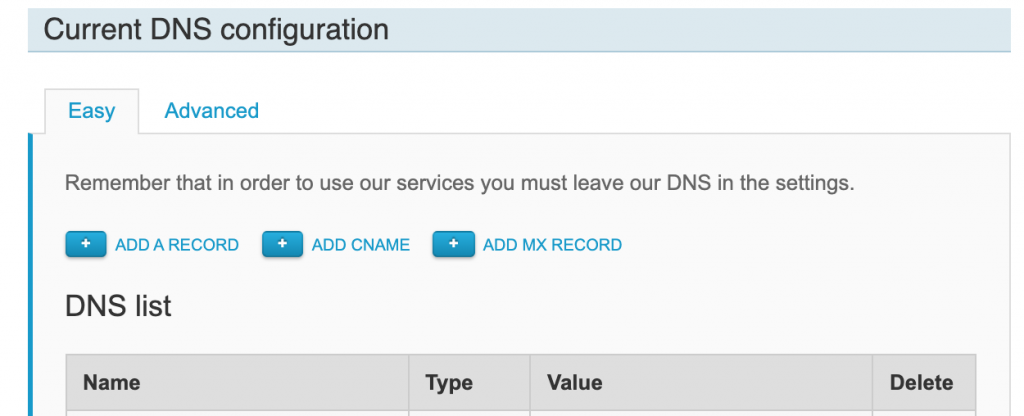
Opened the advanced tab, below the records table, you can click on Add Record and use the following details:
| Type | Domain | Target | TTL |
| A | yourdomain.com | 18.156.195.76 | as default |
| A | www.yourdomain.com | 18.156.195.76 | as default |
After you add your A records, don’t forget to delete all the other A records in conflict with the new ones and click on Apply.
This guide is updated constantly with the most used providers. If you don’t find yours here, try first to search how to do it with your domain registrar and if you have problems, do not hesitate to contact us.


