When it comes to e-commerce, it must be remembered that the customer cannot see and touch the goods in person, so the perceived value of the products and the reliability of the store heavily depend on the quality of the photos used and the design of the website.
It is not simply a question of aesthetics, but of power of attraction: if you use marketplaces where your products are displayed alongside those of the competition – such as Amazon – or if you use platforms where the image is the master – such as Pintrest, using quality pictures can be a determining factor in closing a sale.
This is even more true in this particular historical period, in which online purchases are preferred to physical store purchases and in which high-level product photography plays a key role. However, when starting your own business, having professional images can be difficult because of high prices; that’s why we want to share with you some useful tips on how to take product photos yourself.
If you are taking your first steps on the online market and have a limited budget, but you do not want to renounce beautiful photos, don’t worry: here you’ll find a simple guide to product photography for an attractive and quality ecommerce.
What you need for product photography DIY
Starting from the idea that equipment is essential in the field of photography, we will see how to take product photos diy relying on good equipment and a photographic set created without spending large sums.
Just follow these simple tips to learn how to take your own product photos.
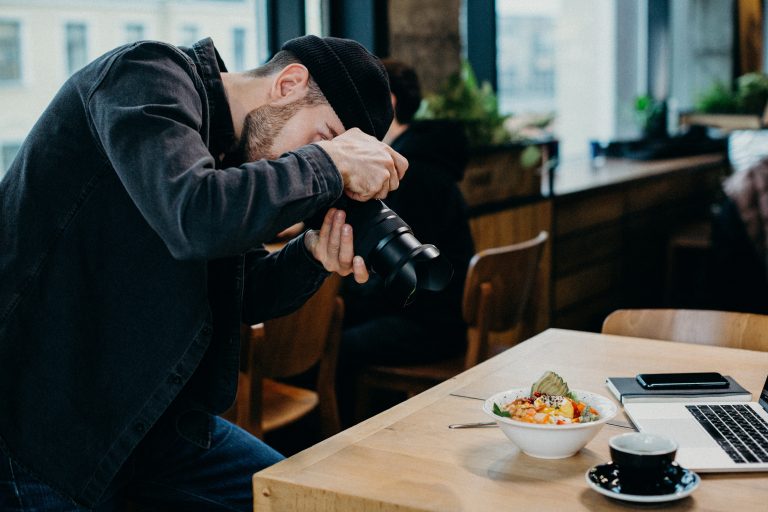
Choose a good camera

Although today you can take high-resolution photos with a simple smartphone, you may want to consider using more professional cameras for your site. You don’t need a superlative camera, of course; all you need for high quality product photography is a DSLR camera (Digital Single-Lens Reflex), more commonly known as a reflex.
This type of cameras allows you to take product pictures at home with superior quality, to shoot in manual mode, to work with the raw technique, to manipulate depth of field; moreover, they are equipped with presets to do all the difficult work for you.
Nikon and Canon are the best known high-end brands; thanks to the wide variety of models available, you can opt for more modest (or even second-hand) equipment and still achieve excellent results.
On the other hand, if you already have a camera at home, experiment with it on how to take product photos at home for your ecommerce: remember that it is not the camera that makes the photo, but a set of elements such as the eye and the style of the person taking the photo, but also light, exposure, styling and post-production.
Buy a tripod
You will agree that there is nothing worse than a blurry photo, especially if it is a product image. When dealing with diy product photography for ecommerce, using a tripod will help you take clear, focused and bright photos, taking advantage of the maximum depth obtainable with a very small lens aperture.

In fact, in a reflex camera, the aperture of the lens is inversely proportional to the exposure time: the greater the shutter opening (to obtain depth of field and sharpness), the shorter the exposure time and, therefore, the least the light captured. Consequently, to get a bright photo, you will need to use a longer exposure time, but without a tripod granting the stability of the camera, you risk getting a blurry subject.
Ultimately, it is advisable to invest in the purchase of a tripod to take your own product photos. Again, it is not necessary to spend a lot: on the market you will find valid tripods for less than $30.
Use a white background

The next suggestion for you to learn how to diy product photography is to set up a good photo set to give your ecommerce images a professional look, while not spending money on expensive gadgets. If you already have a camera, you can create this type of set-up for less than $10.
The main element of the photographic set is the background. When taking product pictures at home for an ecommerce site, a white background is preferred because – unlike a more colorful background – it doesn’t distract the attention of the users, allowing them to stay focused on the product.
If you think you need to photograph a lot, we suggest you go to a photography shop and buy a small photographic backdrop. Otherwise, you can opt for a cheaper solution and buy a white Bristol-type card from a stationery store, flexible enough to be bent slightly to create a curvature. Remember: to achieve the desired effect and take professional-looking e-commerce photos, the cardboard must be pure white and not other variations of white or cream.
Pay attention to brightness
After focus and sharpness, brightness is the most important element to consider for product photography diy.

For this purpose, you could consider using a light box, which is a cube of white fabric designed to take photos with diffused lighting from all angles. Using one will help you take shadow-free images around products and obtain results closer to professional product photography. We are aware that purchasing a light box can be expensive, but there are many online tutorials on how to create a light box with few low cost materials.
Another technique to give brightness to your shots is using reflective panels. Again, if you don’t want to buy expensive ready-made panels, you can use white polystyrene panels, the same height as the product being photographed and three times its width. The goal is to create a panel that bounces the light off the object photographed.
Finally, people who are wondering how to take product pictures at home with artificial lights can choose studio lights: to take photos in the sunlight you may need to change the angle or move the entire set up every time the sun changes position, while with studio lights you can exactly predict how your photos will look at all hours of the day.
Keep these tools close at hand
As the last step of this guide to product photography, we suggest you choose a standard folding table with a width between 60 and 70 cm to place all the material necessary for the shots (white background cardboard, reflective polystyrene panels or light box, product to be photographed).
Furthermore, keep some tape or clips or clothespins handy to better secure the white card or reflective panels. Also, if you can, set up your photo shoot in a room with windows next to a wall with no furniture or pictures or shelves, so that no unwanted shadows are created.
How to take product photography at home for your ecommerce
After having seen the essential requirements to take beautiful pictures for your ecommerce site, let’s move on to explain step by step how to take product photos diy.
Step 1: Prepare the photo set
The time for diy product photography for your ecommerce has come. Firstly, place the table as close to the window as possible, avoiding shadows. Turn off all other lights in the room, as they could disturb the set, and take the first photos keeping the window at 90° to the right or left of the product to be photographed.


If you are wondering how to create effective e-commerce photos, we suggest you try different lighting styles, for example by holding the window at 45° to the set or trying a setting where the window illuminates the set directly from above.
Depending on the product photographed, one type of light is more effective than another. However, direct sunlight is to be avoided, as it is too harsh and often does not benefit neither people nor objects photographed.
Step 2: Set up the background panel
As suggested earlier, use a soft cardstock to create the white background to take product photography at home. Roll it up to give it a curved shape so you can place it in a position between the horizontal and the vertical.

Lean the table against the wall and glue the cardboard to both the table and the wall to create the desired curve. If you don’t have a free wall against which to place the table, find something else to position the panel in the right way, for example a block of wood or books.
Place the product to be photographed in the center of the flat part of the panel and leave enough space on the side to place the reflective polystyrene.
Step 3: Set up your camera
Perhaps the most complicated step, especially if you use a reflex for the first time. Here are some tips for setting up your camera correctly to make great ecommerce photos:

- Set the white balance to “Auto” (automatic).
- Turn off the flash by selecting “off”.
- Set the image quality to the highest value available; if present on your camera, choose the “raw” option: it is the largest file type that can be created, although in this case you will necessarily have to edit the image with a software for raw images (such as Photoshop, Bridge, Lightroom or Aperture). If you don’t have the option for raw files, set it to the largest existing JPG format with size L (large) and quality S (Superfine).
- Set the ISO to 100.
- Adjust the exposure: depending on your experience and shooting ability, choose between manual exposure (the best for this type of work, because you will not risk automatic changes as you shoot), aperture priority (it is possible that your camera does not have this option, but if not, set the f / stop to the highest digit) or auto exposure (if your machine only has automatic functionality).
- If available, use the optical zoom and not the digital one, because the latter would lower the image quality.
Step 4: Position the product to be photographed
So you’re learning how to take your own product photos and, at this point, you have to position the product to be photographed correctly. It may seem one of the simplest things to do, but it is not.
For example, if you want to photograph a bottle and make sure that the label is well positioned in the center, you will realize that it may take several tiny movements to achieve perfect positioning. Do not rush! Good diy product photography takes time, patience, and practice.

Also, unless you want to sell a series of related products, we recommend that you photograph one product at a time, so that the visitors of your ecommerce can see each item individually. This is because images with multiple products could divert the attention of the potential buyer, make him confused or even make him abandon the purchase.
Before to take product pictures at home remember to place the reflective polystyrene panel; as we mentioned, this simple accessory is very important to manage the light on your “low cost photographic set” and should be exploited to the maximum, as the light will bounce off the panel eliminating any shadow.
Step 5: Take the photos and analyze the result
Now that you’ve learned how to take your own product photos, you’re ready to start shooting. Don’t forget that the potential customer cannot examine the object live, so providing a close-up of the product details is always a good idea.

Take your product photos diy. Take more shots than you think you need using different angles, this way you’ll have more images to choose from which works best for your online store. After that, take some time to evaluate the results – what’s good and what’s not working? What could you improve?
Don’t worry if you are not satisfied at the first try – over time and with practice you will improve your knowledge and skills. Anyway, we suggest you analyze the shots on your computer, as looking at them directly from the camera is not very reliable.
Step 6: Retouch your photos
Once you’ve selected your favorite shots, it’s time to retouch your photos and make them perfect.

Editing is one of the most difficult steps, especially for those new to photography. There are numerous advanced editing programs on the market to retouch photos for ecommerce (such as Photoshop), many open-source editing software available for free (such as GIMP, Paint.Net and Photo Pos Pro), but also options for outsourcing the phase image editing (like Pixelz, which allows you to upload and manage the retouching of photos for ecommerce from start to finish).
Step 7: Upload the photos to your ecommerce
Finally, you can upload the results of your product photography DIY to your online store.
If you use an ecommerce platform like Vetrina Live you are in luck, because its software automatically adapts the size of the photos to the format in which the images are displayed on the platform. If your site does not automatically adapt the images, then you will have to resize all the photos before uploading them, otherwise you will ruin all the work done so far.

Finally, an aspect not to be overlooked is SEO: if your ecommerce photos are well optimized, your online store will be more easily found by search engines, bringing you more users and potential purchases.
Recap on the guide to product photography
So far we have shown you how to take product photos at home with a low budget and how to prepare, take and retouch photos for ecommerce. Do not forget, however, that the choice of the shot and the type of photo depends a lot on the product you need to see.
For example, to DIY product photography of clothing, you will need to use light and framing requirements different than product photography for a food store. Also, you can opt for 360º photos for ecommerce accessories (e.g. shoes and bags) while taking macro photos for jewels.
Conclusions
As shown in our article “35 Sites where to find free images for your e-commerce“, nowadays there are many websites where you can find free images to use in your online shop, but we would like to emphasize that choosing customized photos would have a bigger attractive effect.
On the other hand, you could use the generic and impersonal pictures downloaded from free image sites as cover images on your site or on social media or as identification photos of the different categories of goods.
To promote the individual products you sell, however, you must use authentic product photography shots taken by yourself. All you have to do is follow our tips on how to take product pictures at home and get to work!